NPRShader

7.6k words

简介

记录研究卡通渲染时的内容

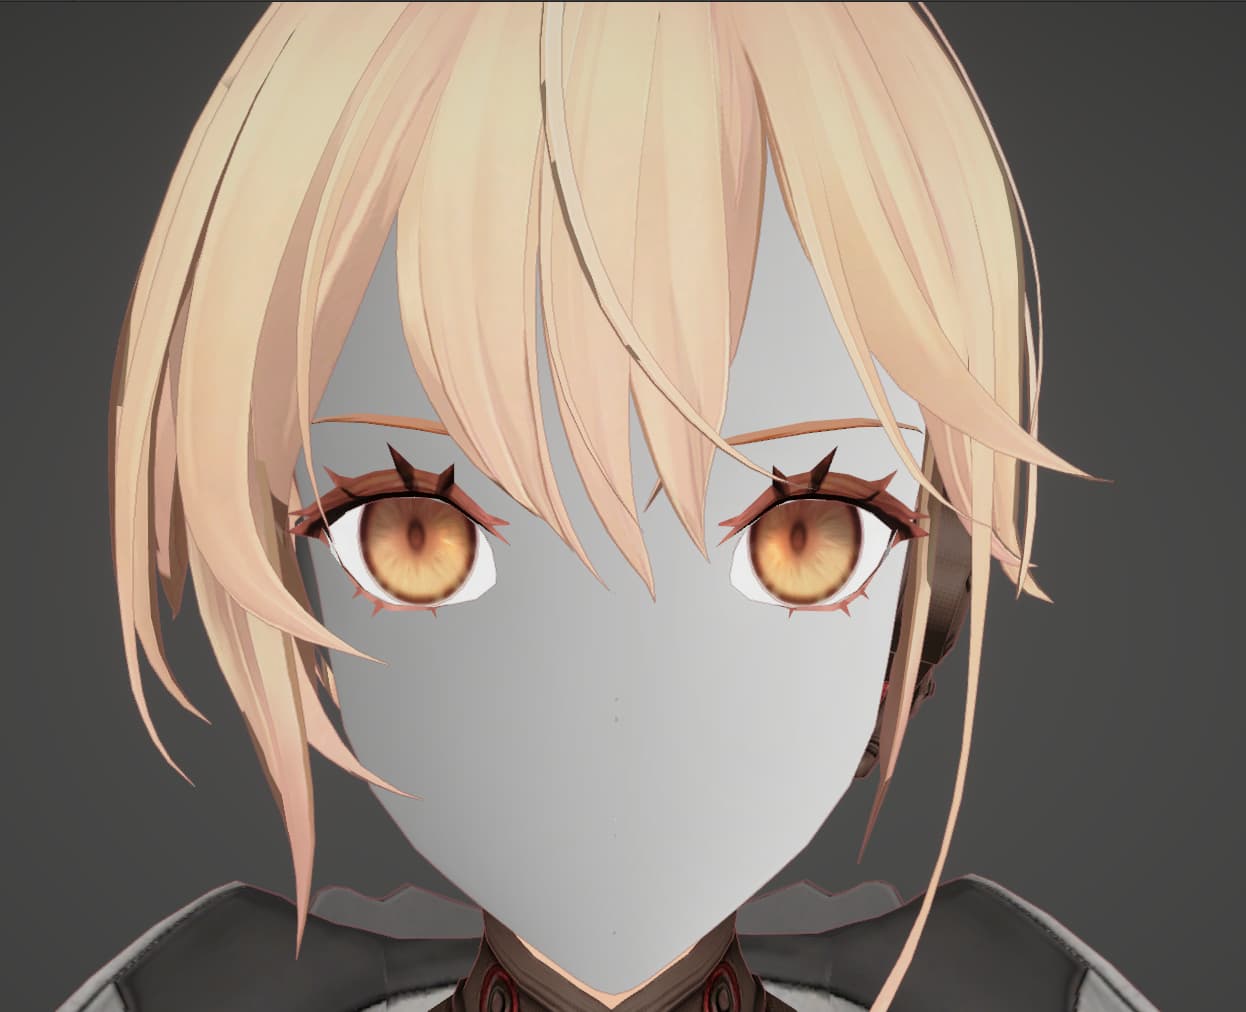
眼睛

二次元角色卡通渲染—眼睛篇 - MIZI的文章 - 知乎

视察映射实现眼睛的凹凸感

1
2
3
4
5
6
#if defined(_Parallax_Eye)
half3 VT = lightData.viewDirectionTS;
half parallax_mask=smoothstep(1.0,0.5,(distance(input.uv,half2(0.5,0.5))/0.4));
half2 parallax_offset=(VT.xy/(VT.z+0.42f))*_EyeParallaxOffset*parallax_mask;
baseColorFinal= SAMPLE_TEXTURE2D(_MainTex, sampler_MainTex, input.uv+parallax_offset) * _MainColor;
#endif

环境反射

高光
在shader中结合Flipbook播放

Matcap
Matcap是一种材质渲染技术,它通过采样一张预计算的材质图片(Matcap texture)来达到渲染材质的效果。
Matcap texture是一张包含材质信息的2D纹理图,通常采用球形映射生成。Shader会根据片元法线在Matcap texture上采样,获取对应的材质颜色,从而实现渲染效果。
Matcap采样的基本步骤是:

  1. 将片元法线(法线贴图或顶点法线)转换到观察空间。观察空间的z轴代表视线方向
  2. 将观察空间法线映射到[-1,1]的范围内。这可以通过除以法线的长度实现
  3. 将坐标轴旋转到z轴对准视线方向,x轴右,y轴上。这完成了从观察空间到Matcap空间的转换
  4. 颜色采样
  5. 得到的RGB颜色值即为片元的Matcap颜色值。可以直接输出或与其他颜色值混合使用
Matcap采样
1
2
3
4
5
6
7
8
9
10
11
12
13
14
15
16
17
18
19
20
21
22
23
24
25
26
27
28
29
30
31
32
inline half3 SamplerMatCap(half4 matCapColor, half2 uv, half3 normalWS, half2 screenUV, TEXTURE2D_PARAM(matCapTex, sampler_matCapTex))
{
half3 finalMatCapColor = 0;
#if _MATCAP
#if _NORMALMAP
half3 normalVS = mul((float3x3)UNITY_MATRIX_V, normalWS);
half2 matcapUV = normalVS.xy * 0.5 + 0.5;
#else
half2 matcapUV = uv;
#endif
half3 matCap = SAMPLE_TEXTURE2D(matCapTex, sampler_matCapTex, matcapUV).xyz;
finalMatCapColor = matCap.xyz * matCapColor.rgb;
#endif
return finalMatCapColor;
}


float4x4 GetWorldToViewMatrix()
{
return UNITY_MATRIX_V;
}


// Tranforms vector from world space to view space
real3 TransformWorldToViewDir(real3 dirWS, bool doNormalize = false)
{
float3 dirVS = mul((real3x3)GetWorldToViewMatrix(), dirWS).xyz;
if (doNormalize)
return normalize(dirVS);

return dirVS;
}
1
half3 normalVS = mul((float3x3)UNITY_MATRIX_V, normalWS);

将法线从世界空间转换为视角空间,可以使用 TransformWorldToView 替代

1
half3 normalVS = TransformWorldToView(normalWS);

进行相机的偏移

1
2
3
4
float3 NormalBlend_MatcapUV_Detail = viewNormal.rgb * float3(-1,-1,1);
float3 NormalBlend_MatcapUV_Base = (mul( UNITY_MATRIX_V, float4(viewDirection,0)).rgb*float3(-1,-1,1)) + float3(0,0,1);
float3 noSknewViewNormal = NormalBlend_MatcapUV_Base*dot(NormalBlend_MatcapUV_Base, NormalBlend_MatcapUV_Detail)/NormalBlend_MatcapUV_Base.b - NormalBlend_MatcapUV_Detail;
float2 ViewNormalAsMatCapUV = noSknewViewNormal.rg * 0.5 + 0.5;

通过权重值,控制过渡

1
return lerp(surfaceData.matcapCol,surfaceData.matcapCol*surfaceData.albedo,_MatCapAlbedoWeight);

焦散
做在贴图,或者根据距离做Mask


SDF

神作面部阴影渲染还原 - 黑魔姬的文章 - 知乎

记录下遇到的坑

这种计算要求脸部的uv是从0-1,但是用的模型,脸部uv是从0.5-1
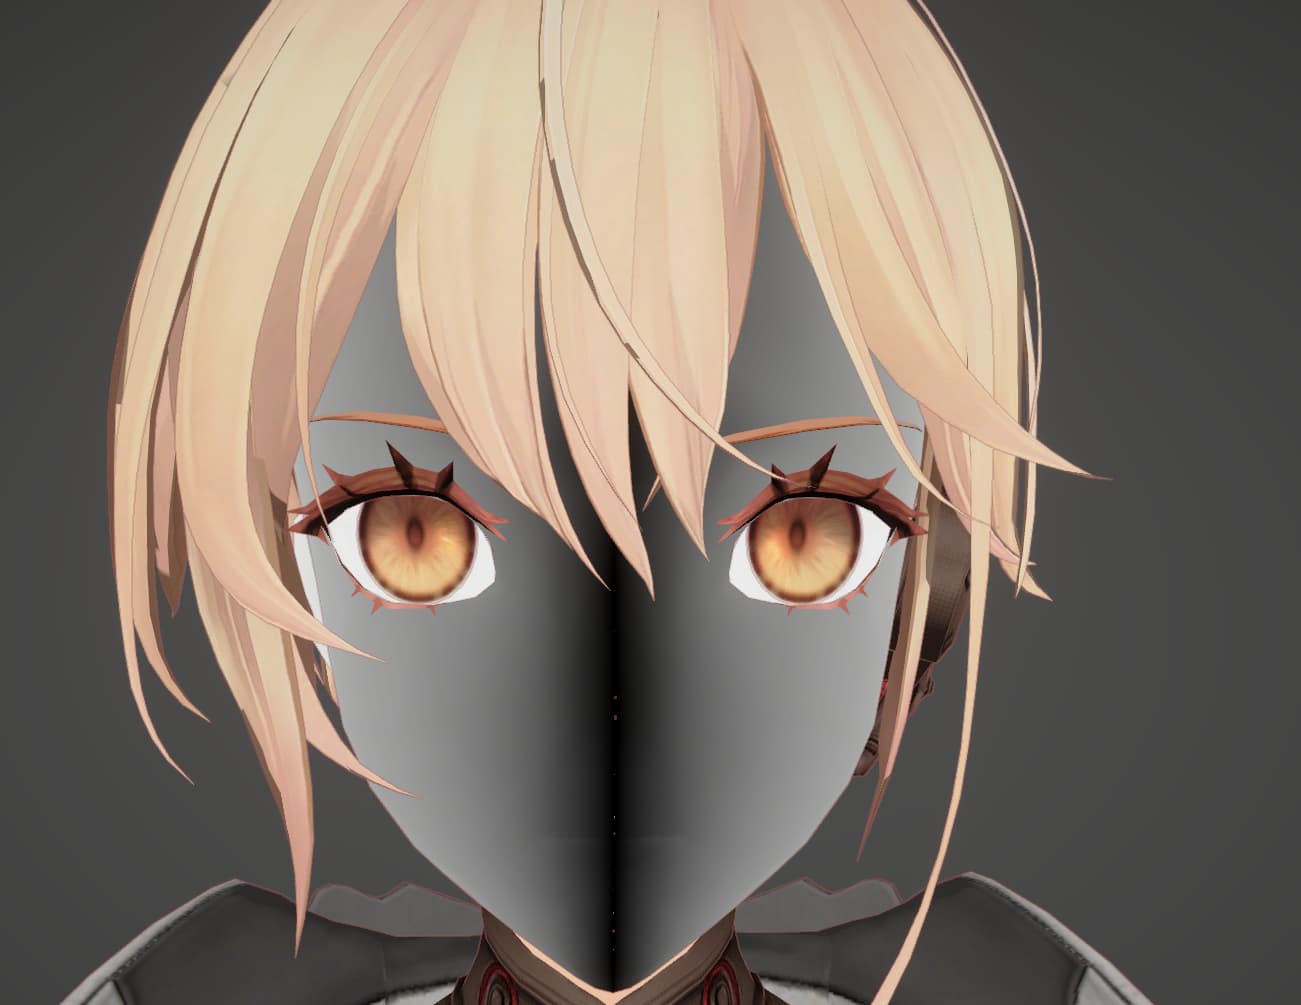
Image text
将uv进行*2-1处理后的结果

Image text
修改后的结果

SDF计算
1
2
3
4
5
6
7
8
9
10
11
12
13
14
15
16
17
18
19
20
21
22
23
24
25
26
27
28
29
30
31

half3 ShadeSingleFaceLight(ToonSurfaceData surfaceData,ToonLightingData lightData,Light light,Varyings input){
// half3 N=normalize(lightData.normalWS);
// half3 V=lightData.viewDirectionWS;
// light.direction.y=0;
// half3 L=normalize(light.direction);
#if defined(_SDF_MAP)

float3 forward=normalize(TransformObjectToWorldDir(float3(0,0,1)));
float3 left=normalize(TransformObjectToWorldDir(float3(-1,0,0)));
float3 right=normalize(TransformObjectToWorldDir(float3(1,0,0)));
half3 lightDir=normalize(float3(light.direction.x,0,light.direction.z));

//uv调整
half filpU= sign(dot(lightData.normalWS,right));
half2 uv=input.uv;
uv.x= (filpU>0)?-(uv.x-1):uv.x;
half3 sdfCol= SAMPLE_TEXTURE2D(_SDFFaceShadowMap, sampler_SDFFaceShadowMap,uv);

half dotF=dot(forward,lightDir);//计算是正面还是背面
half dotL=dot(left,lightDir);
half dotR=dot(right,lightDir);
dotR=-(acos(dotR)/PI-0.5)*2;
// return sdfCol.r;
// float lightAtten=(dotF>0)*min((sdfCol.r>dotR),sdfCol.g>-dotR);
float lightAtten=(dotF>0)*min((sdfCol.r>dotR),sdfCol.g>-dotR);
return lerp(_ShadowMapColor,float3(1,1,1),lightAtten);
#endif
return 0;

}

头发阴影

【Unity URP】以Render Feature实现卡通渲染中的刘海投影 - 流朔的文章 - 知乎

原理
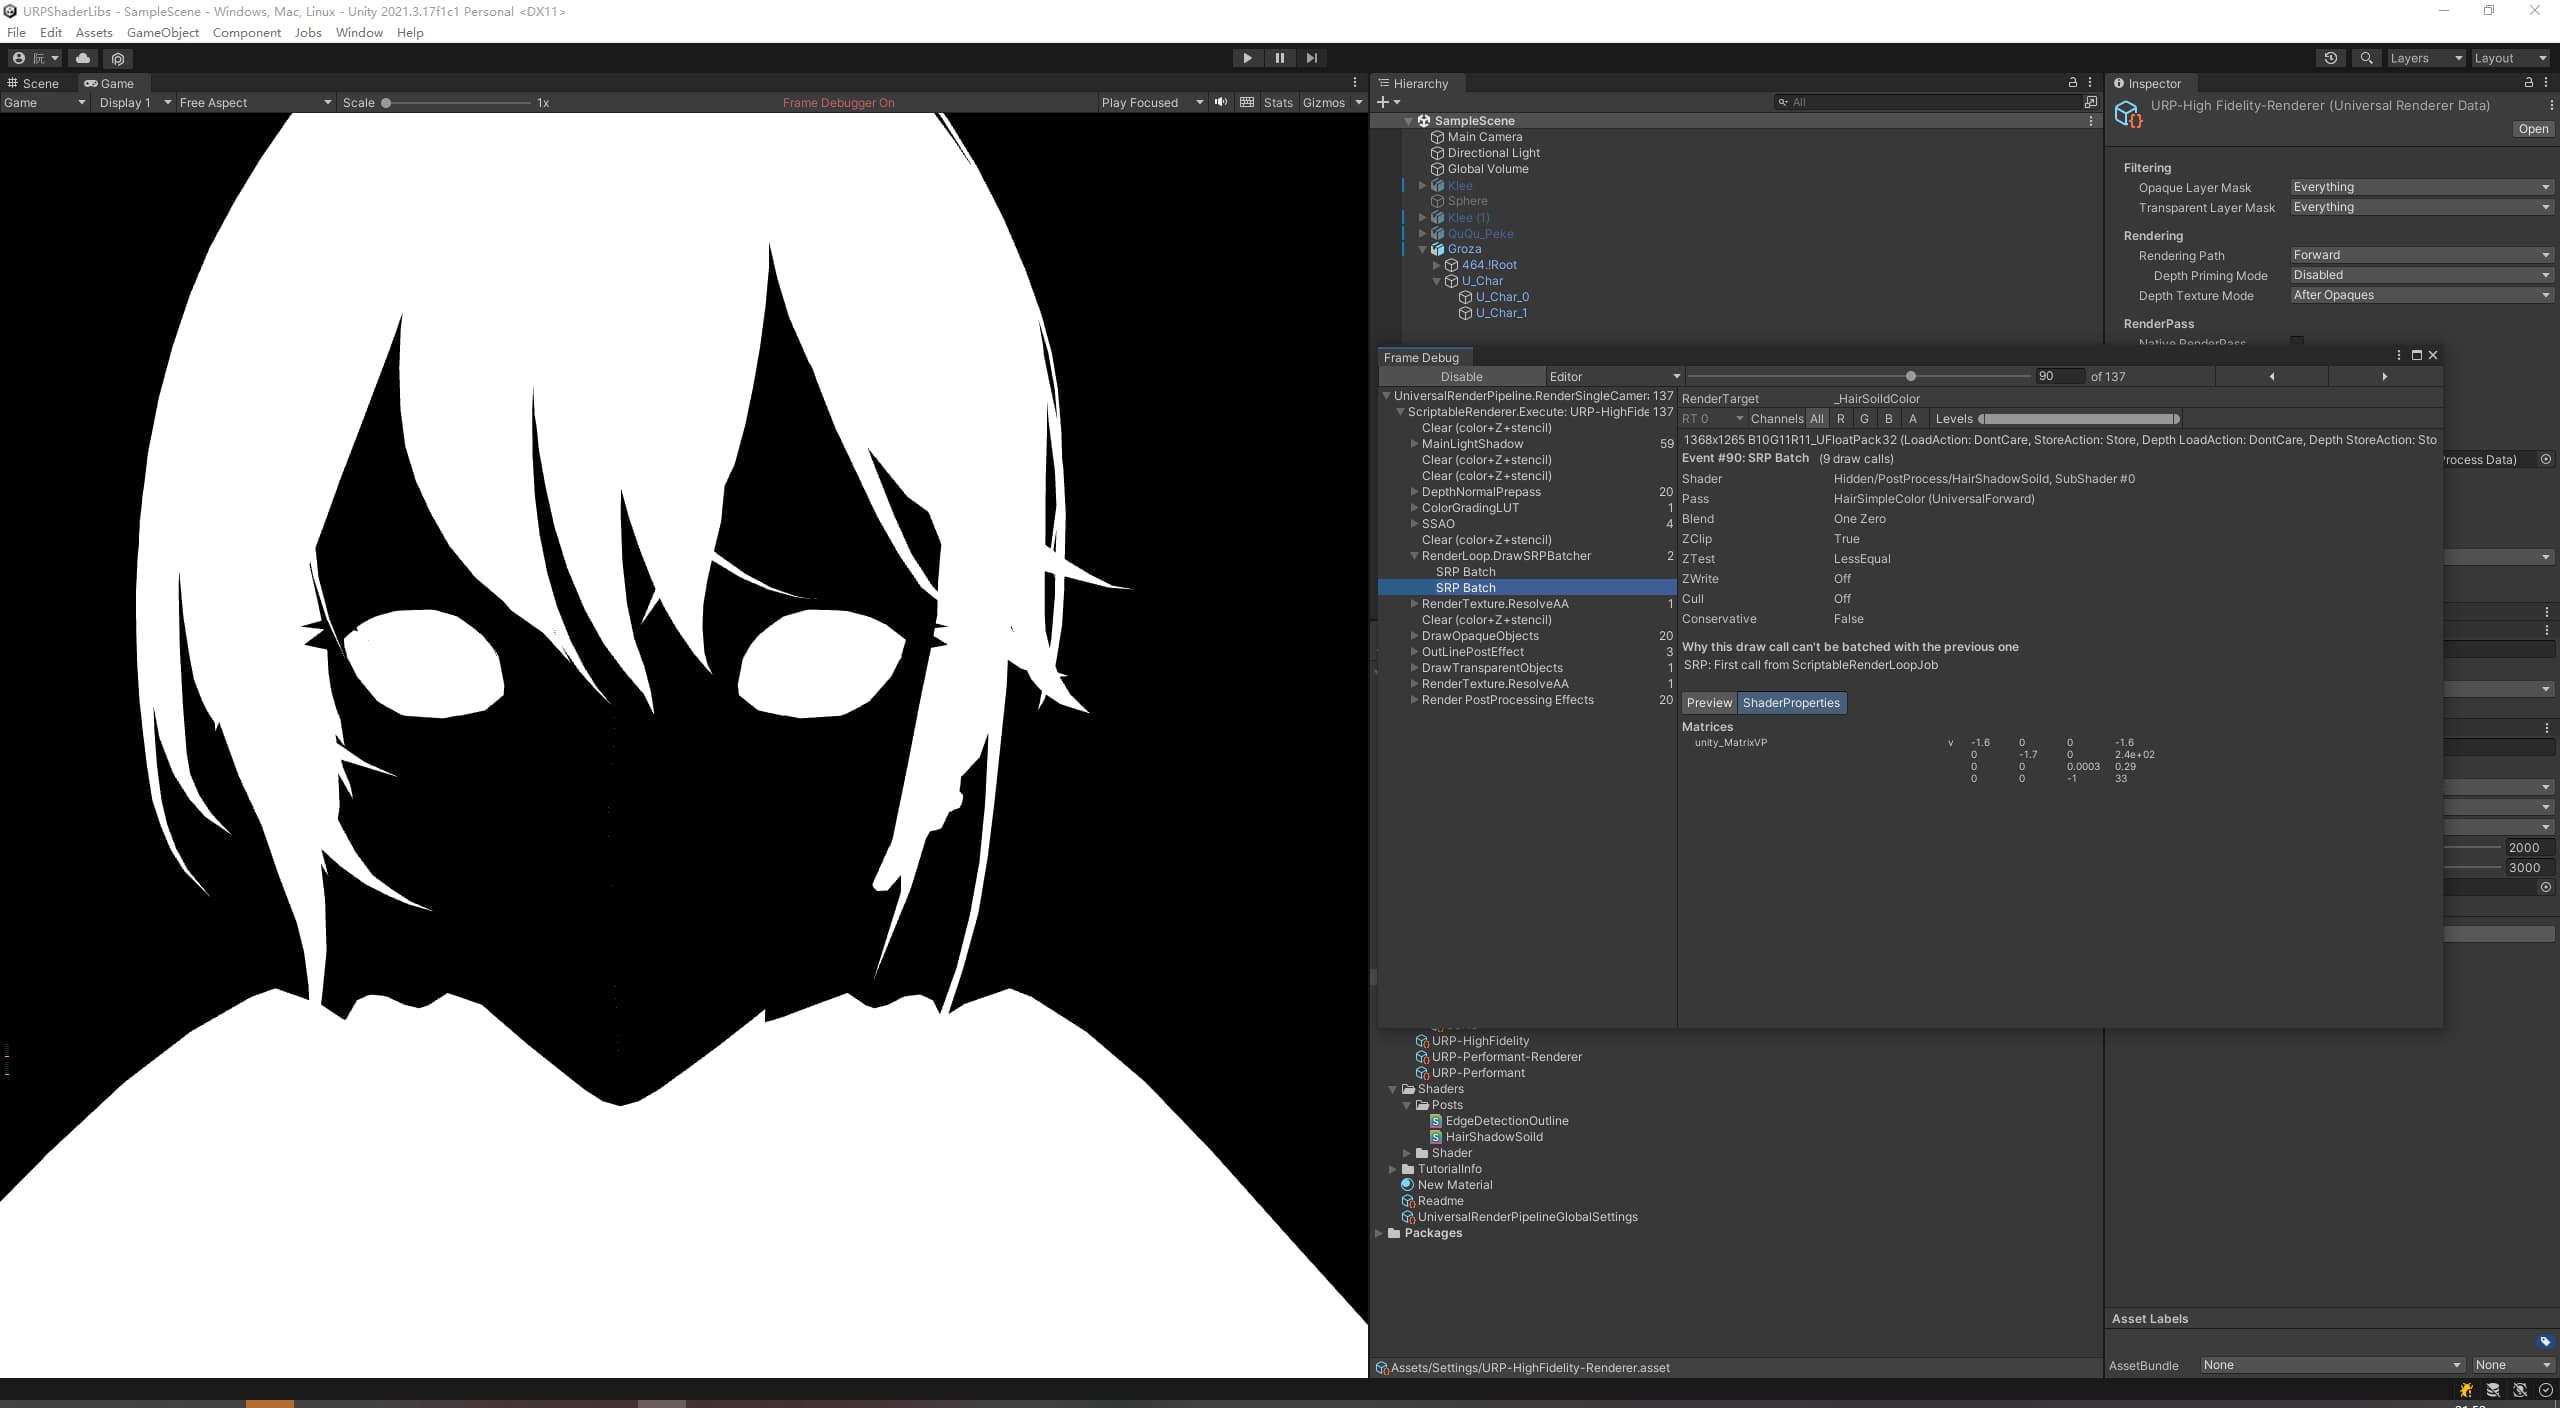
  1. 使用RenderFeature生成纯色 Buffer
  2. 渲染脸部时,对这个纯色 Buffer 采样
ScriptableRendererFeature
1
2
3
4
5
6
7
8
9
10
11
12

public HairShadowSettings settings = new HairShadowSettings();
CustomRenderPass m_ScriptablePass;

/// <inheritdoc/>
public override void Create()
{
m_ScriptablePass = new CustomRenderPass(this.settings);

// Configures where the render pass should be injected.
m_ScriptablePass.renderPassEvent = this.settings.passEvent;
}
Pass
1
2
3
4
5
6
7
8
9
10
11
12
13
14
15
16
17
18
19
20
21
22
23
24
25
26
27
28
29
30
31
32
33
34
35
36
37
38
39
40
41
42
43
44
45
46
47

class CustomRenderPass : ScriptableRenderPass
{
public int soildColorId = 0;
public ShaderTagId shaderTag = new ShaderTagId("UniversalForward");
public HairShadowSettings settings = new HairShadowSettings();
private FilteringSettings filtering;
private FilteringSettings filtering2;

public CustomRenderPass(HairShadowSettings settings) {
this.settings = settings;

RenderQueueRange queue = new RenderQueueRange();
queue.lowerBound = Mathf.Min(settings.queueMax, settings.queueMin);
queue.upperBound = Mathf.Max(settings.queueMax, settings.queueMin);

filtering = new FilteringSettings(queue, settings.faceLayer);
filtering2 = new FilteringSettings(queue, settings.hairLayer);
}

public override void Configure(CommandBuffer cmd, RenderTextureDescriptor cameraTextureDescriptor)
{
int temp = Shader.PropertyToID("_HairSoildColor");
RenderTextureDescriptor desc = cameraTextureDescriptor;
cmd.GetTemporaryRT(temp, desc);
soildColorId = temp;
ConfigureTarget(temp);
ConfigureClear(ClearFlag.All, Color.black);
}

// Here you can implement the rendering logic.
// Use <c>ScriptableRenderContext</c> to issue drawing commands or execute command buffers
// https://docs.unity3d.com/ScriptReference/Rendering.ScriptableRenderContext.html
// You don't have to call ScriptableRenderContext.submit, the render pipeline will call it at specific points in the pipeline.
public override void Execute(ScriptableRenderContext context, ref RenderingData renderingData)
{
var draw1 = CreateDrawingSettings(shaderTag, ref renderingData, renderingData.cameraData.defaultOpaqueSortFlags);
draw1.overrideMaterial = settings.material;
draw1.overrideMaterialPassIndex = 0;
context.DrawRenderers(renderingData.cullResults, ref draw1, ref filtering);

var draw2 = CreateDrawingSettings(shaderTag, ref renderingData, renderingData.cameraData.defaultOpaqueSortFlags);
draw2.overrideMaterial = settings.material;
draw2.overrideMaterialPassIndex = 1;
context.DrawRenderers(renderingData.cullResults, ref draw2, ref filtering2);
}
}
Shader
1
2
3
4
5
6
7
8
9
10
11
12
13
14
15
16
17
18
19
20
21
22
23
24
25
26
27
28
29
30
31
32
33
34
35
36
37
38
39
40
41
42
43
half3 ShadeSingleFaceLight(ToonSurfaceData surfaceData,ToonLightingData lightData,Light light,Varyings input){
// half3 N=normalize(lightData.normalWS);
// half3 V=lightData.viewDirectionWS;
// light.direction.y=0;
// half3 L=normalize(light.direction);
half3 result=0;
#if defined(_SDF_MAP)

float3 forward=normalize(TransformObjectToWorldDir(float3(0,0,1)));
float3 left=normalize(TransformObjectToWorldDir(float3(-1,0,0)));
float3 right=normalize(TransformObjectToWorldDir(float3(1,0,0)));
half3 lightDir=normalize(float3(light.direction.x,0,light.direction.z));


half filpU= sign(dot(surfaceData.normalWS,right));
half2 uv=input.uv;
uv.x= (filpU>0)?-(uv.x-1):uv.x;
half3 sdfCol= SAMPLE_TEXTURE2D(_SDFFaceShadowMap, sampler_SDFFaceShadowMap,uv);

half dotF=dot(forward,lightDir);
half dotL=dot(left,lightDir);
half dotR=dot(right,lightDir);
dotR=-(acos(dotR)/PI-0.5)*2;
// return sdfCol.r;
// float lightAtten=(dotF>0)*min((sdfCol.r>dotR),sdfCol.g>-dotR);
float lightAtten=(dotF>0)*min((sdfCol.r>dotR),sdfCol.g>-dotR);
//考虑脸部阴影
#if defined(_IsFace)
float2 scrPos=input.positionSS.xy/input.positionSS.w;
float4 scaledScreenParams=GetScaledScreenParams();
float3 viewLightDir=normalize(TransformWorldToViewDir(light.direction));
float2 samplingPoint=scrPos+_HairShadowDistance*viewLightDir.xy*float2(1/scaledScreenParams.x,1/scaledScreenParams.y);
float hairShadow=1-SAMPLE_TEXTURE2D(_HairSoildColor,sampler_HairSoildColor,samplingPoint).r;
// return hairShadow;
// return scrPos.x;
lightAtten*=hairShadow;
#endif

result= lerp(_ShadowMapColor,float3(1,1,1),lightAtten);
#endif
return result;

}
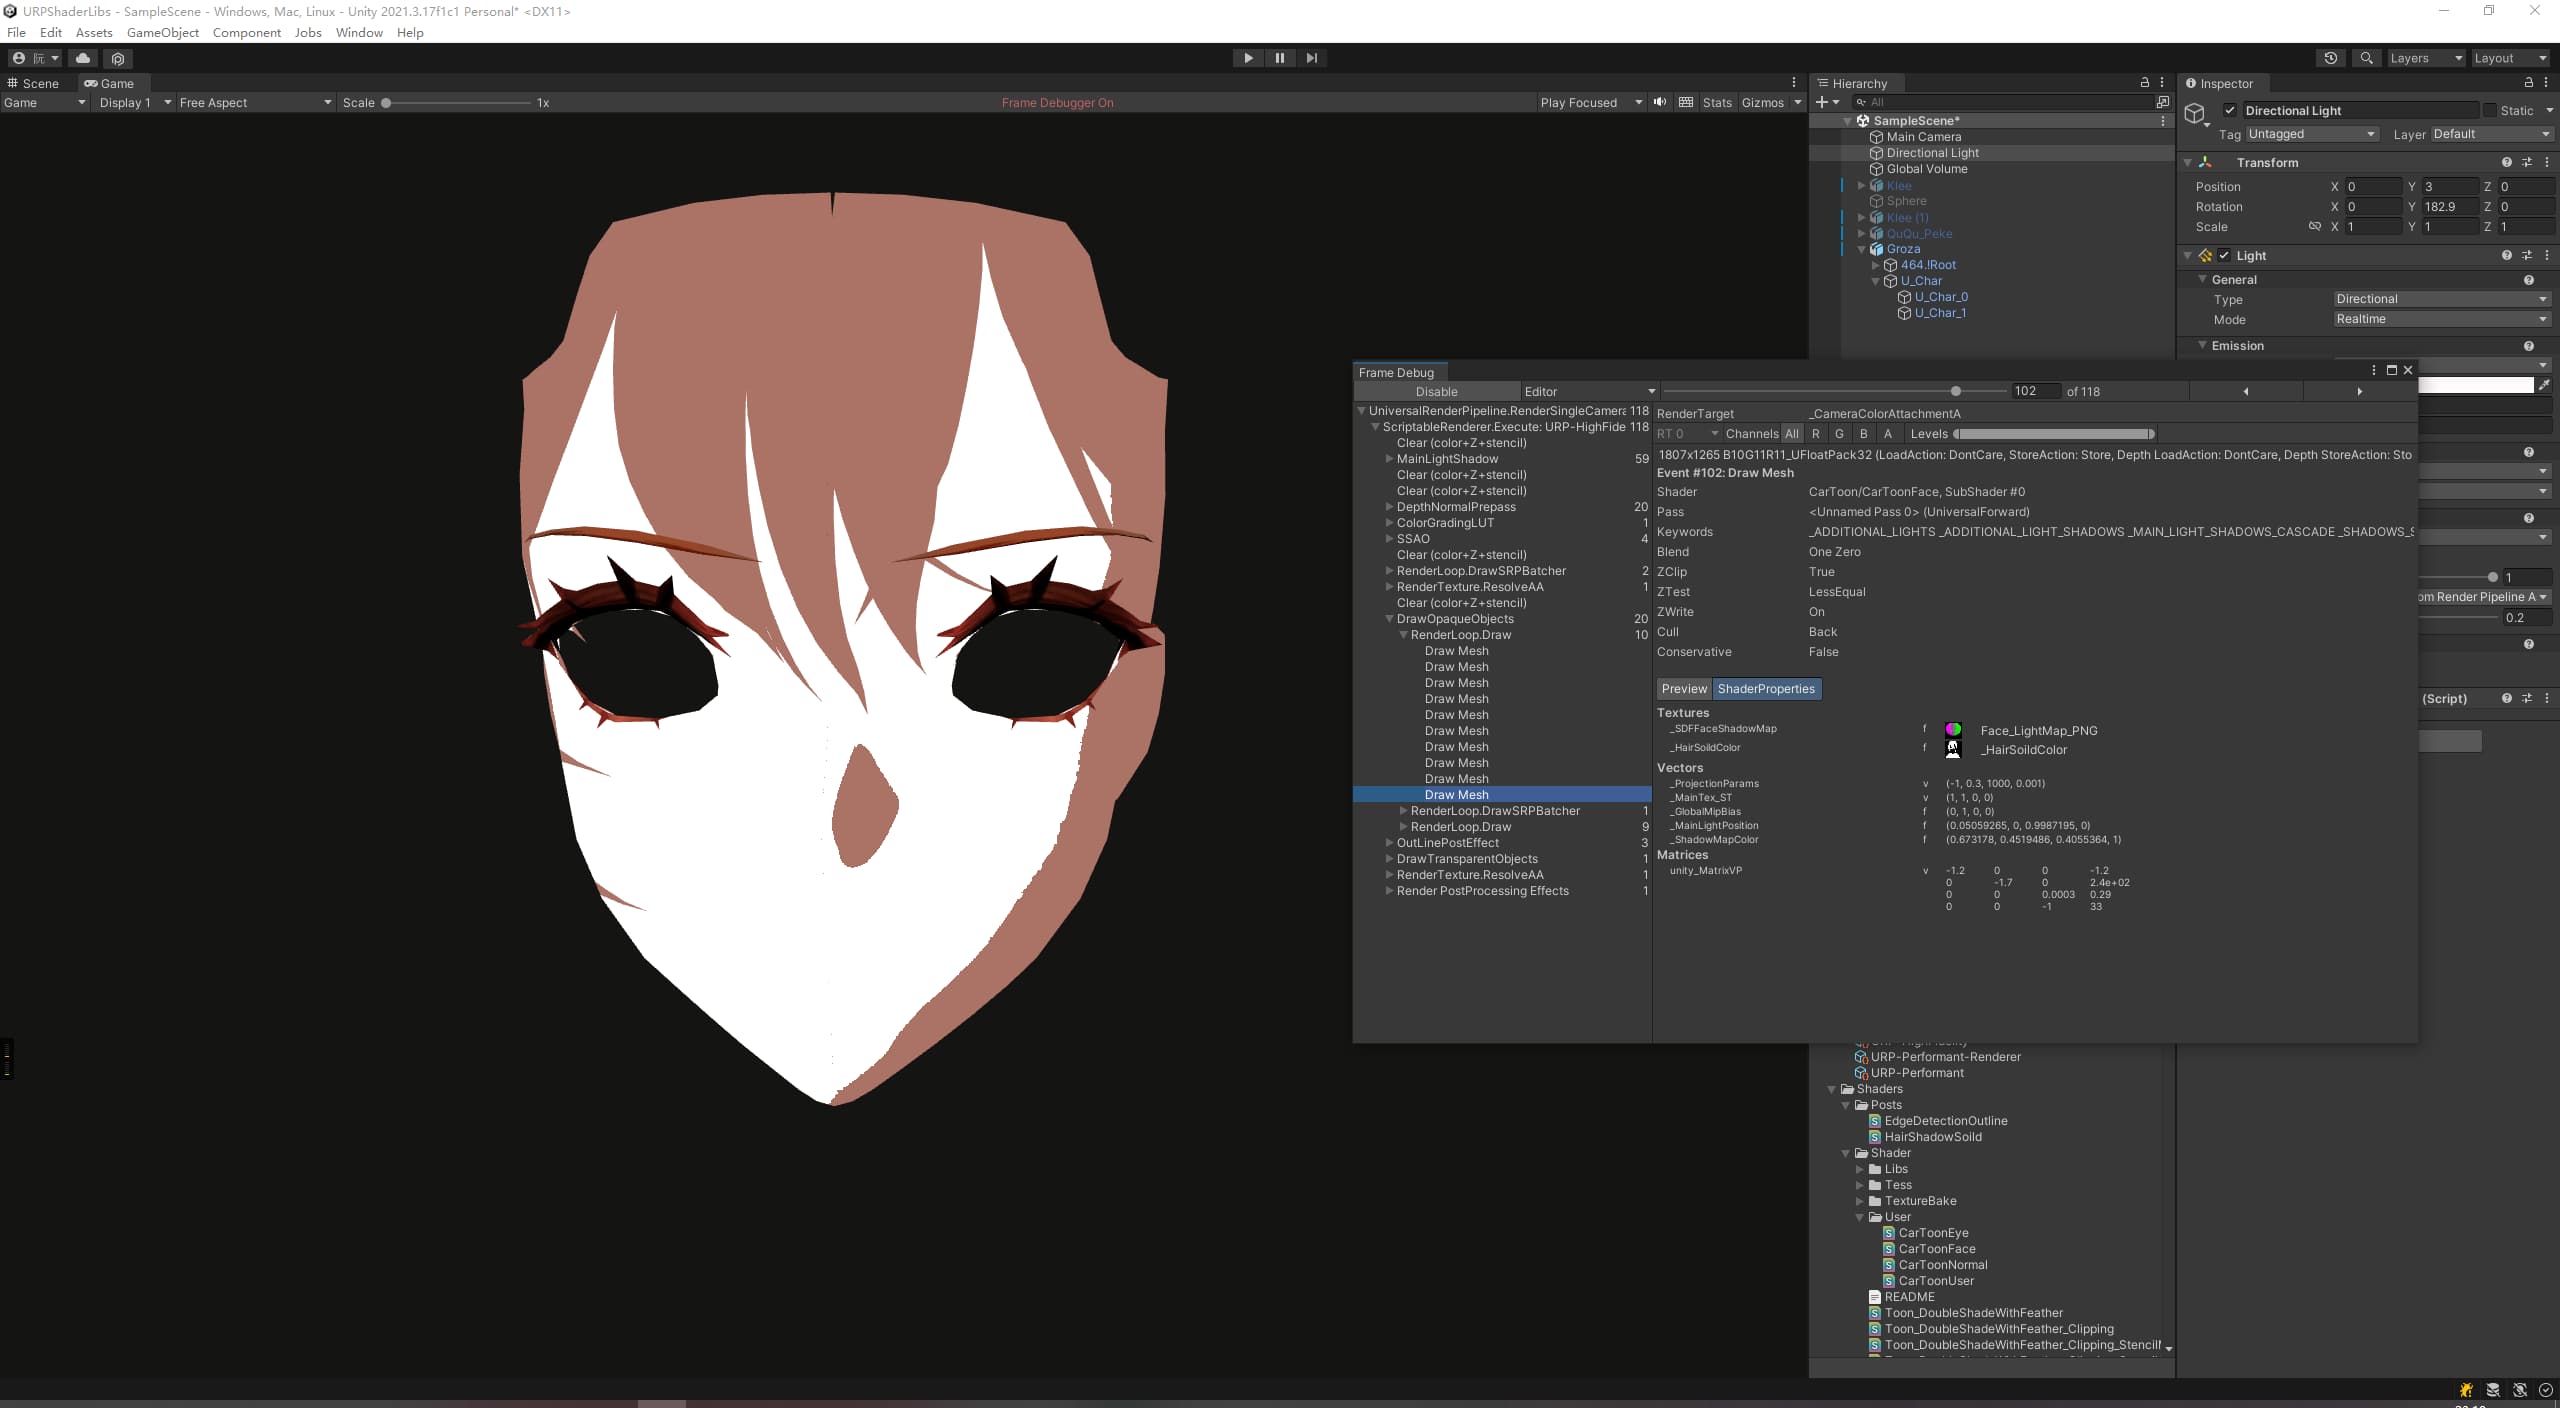
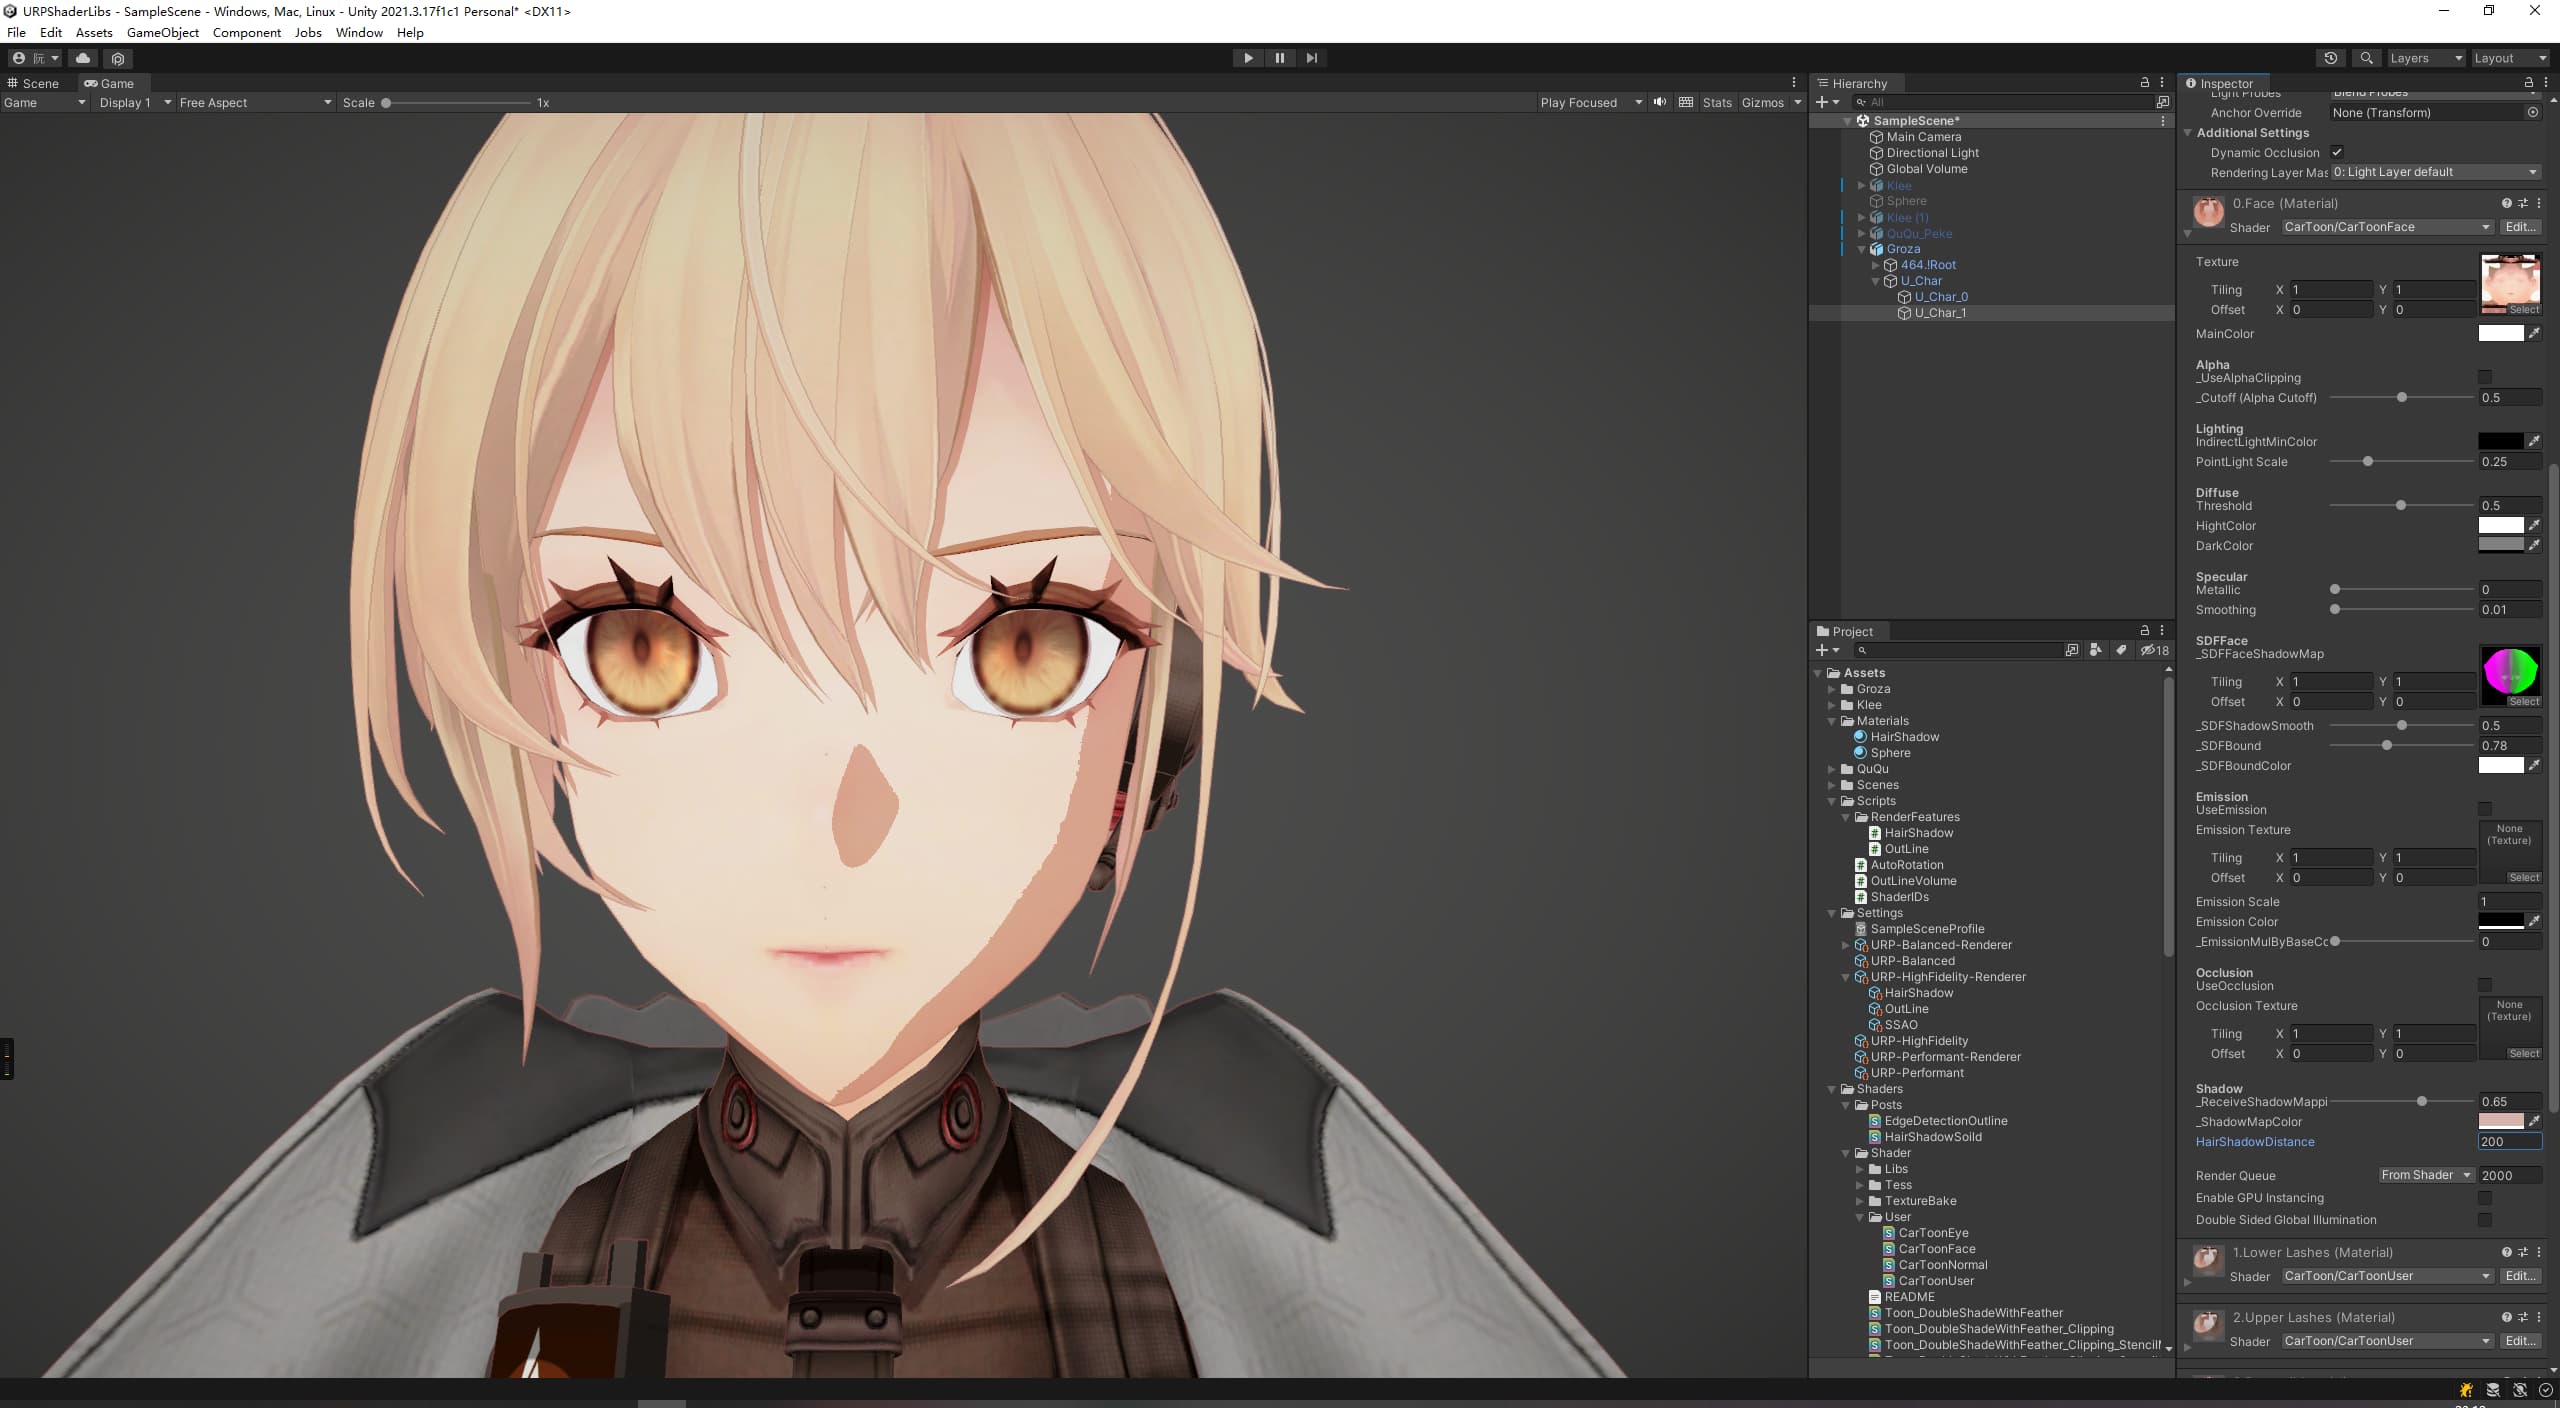
阶段结果

Image text
纯色遮罩结果
Image text
根据视角方向进行偏移采样脸部阴影贴图
Image text
最终结果


深度边缘光


描边

后处理描边

细节


Tonemap

GT Tonemap

色调分离


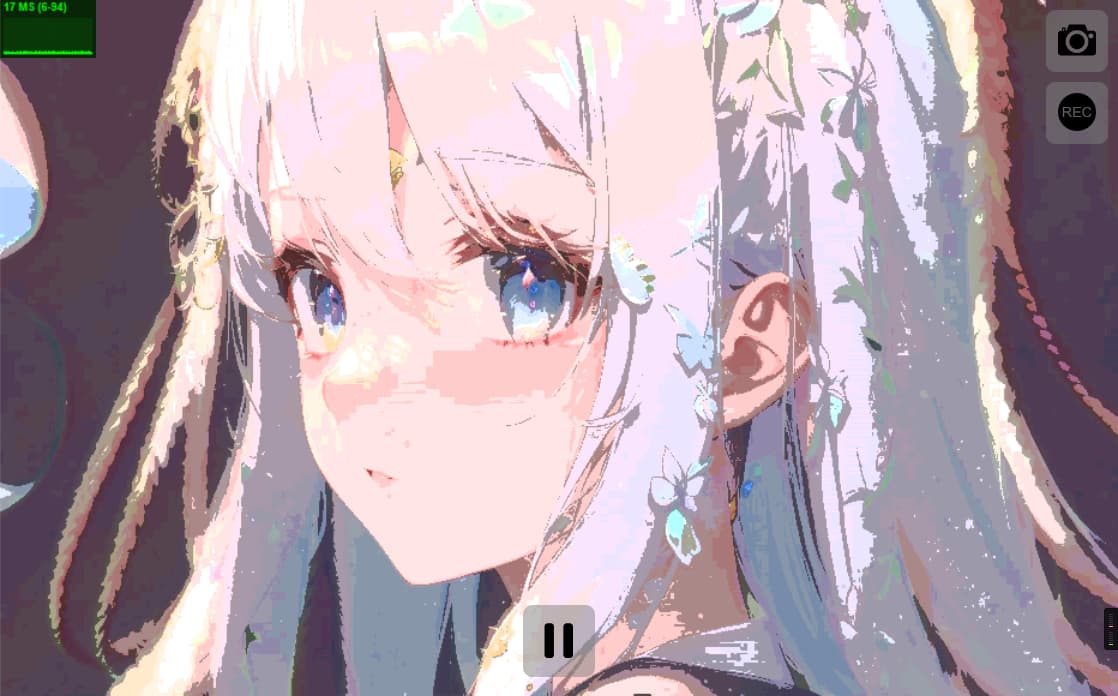
可以用来做个数字油画的游戏

Image text
ShaderToy